Running ESXi nodes in EVE-NG

If you're like me and are curious enough to check EVE-NG under the hood, you might have noticed that there is a template for VMware ESXi, but it's not listed as supported and is in fact hidden by default. However, if you're willing to tinker a bit, it is possible to run ESXi nodes in EVE-NG. So let's give it a shot!
Getting ESXi images
First stop is acquiring some images for ESXi. Of course it's possible to create your own QEMU image by installing from an official ESXi installation CD, but that's a lot of work. It's much easier to start with the Nested ESXi images by William Lam, who has done most of the work for us. You can grab images for ESXi5.5, ESXi6.0 and ESXi6.5 straight from vmware.com.
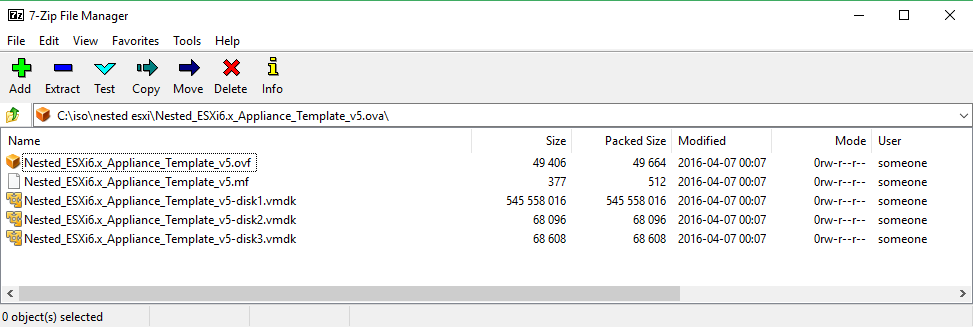
All these images are .ova files with three disks:
- A 2GB system disk (disk1)
- A 4GB data disk (disk2)
- A 8GB data disk (disk3)
To get an image that's compatible with EVE-NG, you need to take the following steps:
1. Upload the disk files to EVE-NG
Open the OVA with your favorite archiving program, extract disk 1 and 2, and copy them to your EVE-NG virtual machine. I'll assume you've managed to copy disk1 and disk2 from the ESXi6.0 OVA to /tmp.
2. Convert the disks
QEMU doesn't handle vmdk files, so you need to convert them to qcow2 format.
cd /tmp
qemu-img convert -f vmdk -O qcow2 Nested_ESXi6.x_Appliance_Template_v5-disk1.vmdk hda.qcow2
qemu-img convert -f vmdk -O qcow2 Nested_ESXi6.x_Appliance_Template_v5-disk2.vmdk hdb.qcow2
3. Expand disk 2
As mentioned, disk 2 is all of 4GB large. That's fine if you're going to use some external storage, but it's probably smart to enlarge it a bit, it'll be sparse anyway.
qemu-img resize hdb.qcow2 50G
4. Move the files
Move the files to their final destination. The folder should be named /opt/unetlab/addons/qemu/esxi-(version) for EVE-NG to be able to find them:
mv /tmp/*.qcow2 /opt/unetlab/addons/qemu/esxi-6.0u2
5. Clean and fix permissions
rm /tmp/*.vmdk
/opt/unetlab/wrappers/unl_wrapper -a fixpermissions
Repeat as desired for ESXi5.5 and ESXi6.5. For now I prefer to use the 6.0u2 image, it seems to be a bit more stable and the embedded Web Client works fine.
Enabling ESXi in EVE-NG
So now we have QEMU images for ESXi, but we're still a ways from being able to run them. We need to ensure that we're able to run nested hypervisors, and enable the ESXi template in EVE-NG.
Nested Virtualization
Nested virtualization should be enabled in your EVE-NG image by default, but it's easy to verify. You can check whether VT-x and EPT are enabled in your system:
cat /sys/module/kvm_intel/parameters/nested
cat /sys/module/kvm/parameters/ignore_msrs
cat /sys/module/kvm_intel/parameters/ept
Each of these commands should return 'Y'. If they don't, set them to '1' manually, and reboot EVE-NG:
echo 'options kvm_intel nested=1' >>  /etc/modprobe.d/kvm-intel.conf
echo 'options kvm ignore_msrs=1' >>  /etc/modprobe.d/kvm-intel.conf
ESXi template
The template for ESXi is already included in EVE-NG, you can find it under /opt/unetlab/html/templates/esxi.php. You need to make a tiny change to the template to get it to work. If you don't , you'll get a purple screen complaining about an "unsupported CPU".
Original:
$p['qemu_options'] = '-machine pc,accel=kvm -serial none -nographic -nodefconfig -nodefaults -display none -vga std -rtc base=utc';
Working:
$p['qemu_options'] = '-machine pc,accel=kvm -cpu host -serial none -nographic -nodefconfig -nodefaults -display none -vga std -rtc base=utc';
Activate the template
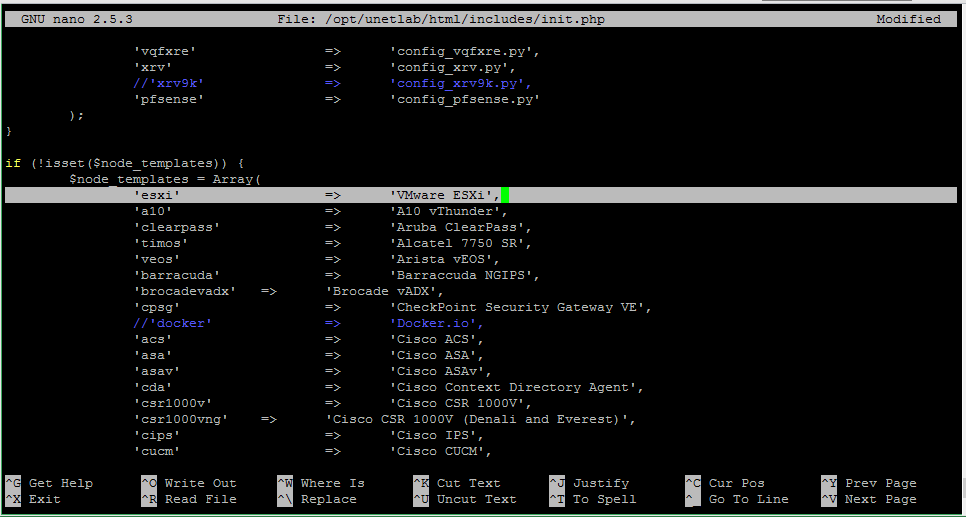
As a final step, you need to activate the template. There used to be a (commented-out) line for the ESXi template in /opt/unetlab/html/includes/init.php, but it's gone in the latest version of EVE-NG. No worries, you can just add it yourself:
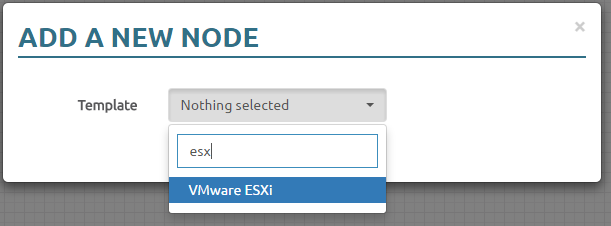
Now select 'VMware ESXi' as node type:
Running ESXi nodes
Finally, we're ready to run our ESXi server. Add it to your topology, and don't reduce the CPUand memory settings; ESXi requires at least 2 CPU's and 4 GB of RAM to be able to boot at all. I usually connect the first NIC (e0) to a bridged network, so I'll be able to access the ESXi-server through the Web Client from the client for management access.
Once you've started your ESXi server, you can configure the network through VNC, and then access the Web Client from your device. Default credentials for the image I'm using are root without a password. Your first step should be to add a datastore; check the VMware documentation for detailed steps. You'll have one local disk available to create the datastore, that'll be cloned from hdb.qcow2 that we created from disk 2 from the OVA file.
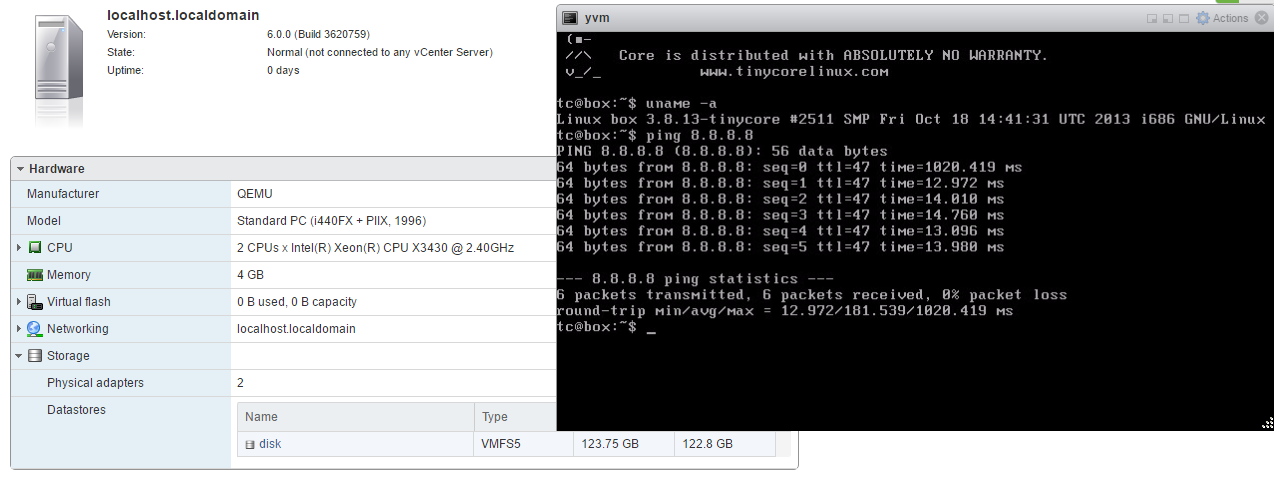
Now that we have a datastore, we can start to add VMs. With my setup I'm now three hypervisors deep, so I'm a bit short on CPU to run actual workloads; running a vCenter Server Appliance at this point is an exercise in wishful thinking. To validate my setup I'll be using the smallest VM I can find that's still a fully functional machine with VMware tools installed: yVM. Grab the OVA here, and deploy using the webinterface.
Unfortunately, there is still another problem to solve. The VM won't start, and ESXi throws an error:
Failed to power on virtual machine yVM. You are running VMware ESX through an incompatible hypervisor. You cannot power on a virtual machine until this hypervisor is disabled.
Luckily, this too can be solved: add vmx.allowNested = TRUE to your VM's configuration (in the Web Client under Edit Settings > VM Options > Advanced > Edit Configuration > Add Parameter.
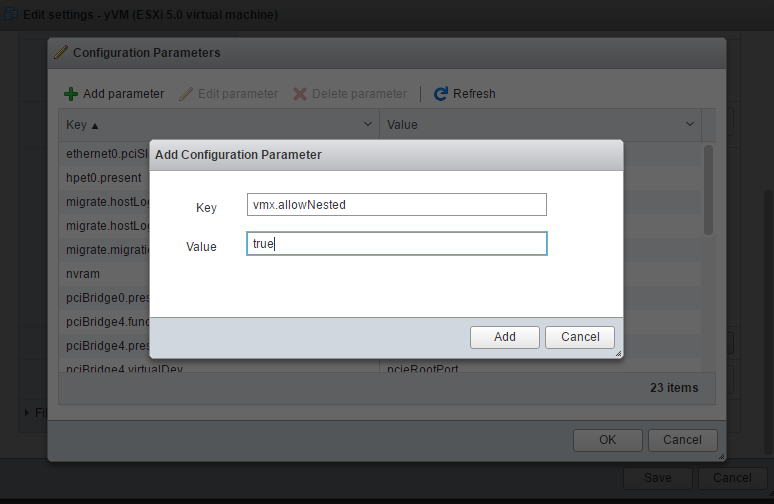
You'll have to do this for all your VMs, or add it to /etc/vmware/config from the ESXi console:
[root@localhost:~] echo 'vmx.allowNested = "true"' >> /etc/vmware/config
Now you can start your VM, and lab away!